
Table of Contents
If you are a new user to Mac system, and if you are looking to capture screenshot on Mac then this post “5 Easy Ways To Capture Screenshot on Mac” will be helpful for you. In windows system, there is a utility called Snipping tool with which you can capture screenshots but on Mac system, we need to use keyword shortcuts to achieve this.
With keyboard shortcuts, it is possible to generate screenshot images and you can simply cut/copy paste these screen capture images to get your job done. Even there is a facility to capture screen activities in movie file format which we are going to see in this post. In this post you will learn various screen capture methods like – screenshot of whole screen, screenshot of part of the screen, screenshot of window and screen of menu with and without title. So without wasting any time, let’s get started.
How to take a screenshot in mac
-
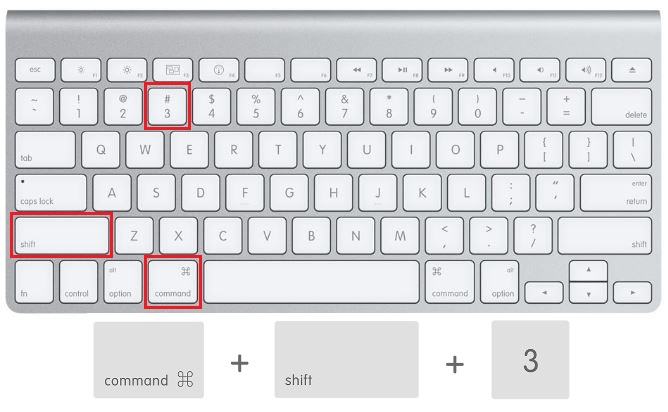
Screenshot of the entire screen
If you are looking to take screenshot of entire screen then there is a keyboard shortcut Command + Shift + 3. Once you press this combination of keys, an entire screen capture image in .PNG format will be saved on desktop.
-
Screenshot of part of the screen
If you are looking to capture part of the screen, then you should use keyboard shortcut Command + Shift + 4. By pressing this keys combinations, mouse pointer will change to crosshair pointer. Simply move the crosshair pointer where you want to take screenshot and then drag the pointer to select the area. Once you release the mouse button, a .PNG image of selected area screen capture will be available on desktop. To cancel the operation, press Esc key on keyboard.

Keyboard shortcut – Screenshot of part of screen -
Screenshot of the window
This feature will be useful if you want to take screen capture of a particular window/application. To achieve this use keyboard shortcut Command + Shift + 4. By doing this mouse point will change to crosshair pointer. Then press the space bar so that crosshair pointer will change to camera pointer. You need to move this camera pointer over the window to highlight the same. Left click on mouse so that .PNG image of window screen capture will be created on desktop.
-
Screenshot of Menu
This method is for taking screen capture of the menu and its contents. To take the screenshot, click on the menu to display its contents. Then use keyboard shortcut Command + Shift + 4. As we seen earlier, mouse pointer will change to crosshair pointer. Now drag the area to select the menu and its contents. Release mouse button so that .PNG image of menu screenshot will be created on desktop.
-
Screenshot of Menu without title
This method is for taking screen capture of the menu and its contents without title. To take the screenshot, click on the menu to display its contents. Then use keyboard shortcut Command + Shift + 4. Here as well mouse pointer will change to crosshair pointer. Now press space bar and crosshair pointer will change to camera pointer. Highlight the menu by moving camera pointer over the menu and its contents. Click mouse button to take screen capture so that .PNG image of menu screenshot will be created on desktop.
I have tried to explain above methods in much simpler way and I hope this post is helpful to you.
Here are some bonus tips:
Created screenshots get saved as .PNG files and automatically named as “Screenshot date at time.png”
If you want to take several screenshots and don’t want to save these files on desktop, then you may choose to save the files to clipboard using keyboard shortcut Command + Shift + Control + 3/4